Salmon and Rigatoni

Tu Tu Tun Lodge on the Rogue River

Tu Tu Tun Lodge on the Rogue River


You are what I eat and I know that you felt every ounce of adrenaline pulsing through my body when I reeled in these Chinook Salmon for you to eat. I hope that when you eat, you will have a story to tell about where you food was grown or raised. Reeling in this salmon took me about 20 minutes and Stefan and our guide Jay gently guided me through every tug of my rod. Because I had no idea what I was doing. When we finally “landed the fish”, my first thought was how YOU felt about all of the commotion. Were you ok? Did you like it? Did I pull the muscles that are supporting you? Will this experience make you want to fish with Stefan and I? I hope so. I know so.

Stefan and I went on a road trip in the van the week of Labor Day.

Cape Blanco

Cape Blanco


We camped with friends on the Umpqua for 2 nights, camped at Cape Blanco, slept in a lodge on the Rogue river where we caught the 4 salmon, camped at Golds Bluff Beach in the Redwoods in Northern California, swam in the Smith River and had a fantastically fun baby shower with our Corvallis family.

Since our road trip, we have been staying close to home. This weekend, I made some good food.

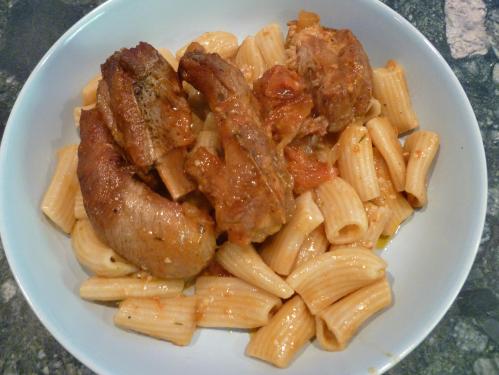
Braised Spareribs with Rigatoni
Ingredients

Braised Spareribs with Rigatoni

Braised Spareribs with Rigatoni


* 1/4 cup olive oil
* 4 pounds pork spareribs, cut into individual ribs
* 1 pound onions, thinly sliced
* 10 large garlic cloves, chopped
* 8 cherry peppers from jar, drained, seeded, chopped
* 3/4 teaspoon dried crushed red pepper
* 3 28-ounce cans Italian-style tomatoes in juice
* 1 cup canned low-salt chicken broth
* 1 cup dry white wine
* 4 large fresh thyme sprigs
* 2 bay leaves
Rigatoni
* 1 pound rigatoni
* 1 1/2 cups freshly grated Parmesan
* 1/3 cup chopped fresh Italian parsley

Instructions
Heat oil in heavy large pot over high heat. Sprinkle spareribs with salt and pepper. Working in batches, add ribs to pot and brown on all sides, about 6 minutes.

Transfer ribs to bowl. Add onions, garlic, cherry peppers and crushed red pepper to pot. Sauté until onions just begin to brown, about 10 minutes. Add tomatoes with their juices. Using back of fork or potato masher, coarsely crush tomatoes. Return spareribs and juices to pot. Add broth, wine, thyme and bay leaves and bring to boil. Reduce heat to medium- low. Simmer uncovered until spareribs are very tender and sauce thickens, stirring occasionally, about 2 hours. Season with salt and pepper. (Can be made 2 days ahead. Cool slightly. Refrigerate until cold, then cover and keep chilled. Remove chilled fat from top of sauce, if desired. Rewarm before continuing.)

Cook pasta in large pot of boiling salted water until just tender but still firm to bite. Drain and return pasta to same pot. Add cheese, parsley and some sauce from spareribs and toss to coat. Transfer pasta to large bowl. Top with spareribs and remaining sauce and serve.

Zucchini Bread Cake
Ingredients
* 2 1/2 cups Flour
* 1/2 cup cornmeal
* 1/2 teaspoon salt
* 1 tablespoon baking powder
* 1 cup sugar
* 1 teaspoon cinnamon
* 1/2 teaspoon ginger
* pinch of nutmeg and cloves
* 2 eggs
* 1/4 cup melted butter, more for greasing pan
* 1 1/4 cups milk
* 1 cup shredded zucchini
Optional–chocolate chips, walnuts

Instructions
1. Preheat oven to 350 degrees. Grease a 9-by-5-inch loaf pan with butter, or butter.
2. In a large bowl, combine all dry ingredients.
3. Beat the egg with the butter and milk.
4. Fold in wet ingredients into the dry and add the zucchini. Batter should be lumpy, not smooth.
5. Pour into prepared loaf pan and bake about an hour.

–From Mark Bittman’s How to Cook Everything

Walnut Pesto

* 2 loosely packed cups fresh basil leaves, big stems discarded, rinsed and dried
* Salt to taste
* ½ to 2 cloves garlic, crushed
* 2 tablespoons pine nuts or walnuts, lightly toasted in a dry skillet
* ½ cup extra virgin olive oil, or more
* ½ cup freshly grated Parmesan or other hard cheese (optional)
Instructions
1. Combine the basil, salt, garlic, nuts and about half the oil in a food processor or blender (or mortar and pestle).
2. Process, stopping to scrape down the sides of the container occasionally, and adding the rest of the oil gradually. Add additional oil if you prefer a thinner mixture. Store in the refrigerator for a week or two, or in the freezer for several months (omit next step/cheese if freezing – and drizzle top with oil to preserve). Stir in the parmesan by hand just before serving.

–From Mark Bittman’s How to Cook Everything

Golds Bluff Beach

Golds Bluff Beach

Stecca

This week, I made bread again. I used to make bread at least once a week. I fell head over heels in love with bread when I started to visit Acme Bread in Berkeley.

I love making bread because it is an art–and I am not an artist in the traditional sense of the word. Bread is something that I can make and that I am good at making. That makes my husband’s face light as he grabs his weapon of choice, a knife coated in butter. He walks into the kitchen after I pull a loaf out of the oven and voila! Half the loaf is gone. Baking bread is similar to painting, welding or sculpting. It is an art that takes time and practice. Trial and Error. I am not a good painter, welder or sculptor. Instead of creating a piece of art that you can hang on the wall or set on a table, I make a piece of art that you can devour with butter. And, jam.

You are what I eat Little O and in about 11 weeks, I get to meet you. In the meantime, I hope that you will soak up the good things about baking bread and eating bread. That you can easily impress most with a few simple ingredients and time. That you will always have a gift to give someone that you created for any occasion. That you can linger in bakeries or at your best friends’ tables tearing off chunks of bread and dipping them in a variety of things. That you will know and learn that time will do the work for you when it comes to creating great things. And, that does not just apply to bread sweet baby.

I tried this new recipe from the Sullivan Street Bakery cookbook. It was easy and tasted delicious. And versatile. You can add things on top of the bread. Make an easy picnic with some salami, cheese, basil and tomato in the middle. Or simply dip in some olive oil.

Stecca (by Jim Lahey)

* 400 grams (3 cups) bread flour
* 8 grams (1 1/4 t.) salt
* 1 gram (1/4 t.) active or instant yeast
* 300 grams (1 1/2 cups) cool (55-65 degree) water
* olive oil for pan and drizzling
* flour for dusting

In a medium bowl, stir together flour, salt and yeast. Then, add water and mix about 30 seconds until you have a wet sticky dough. Cover and let sit at room temperature for 12-18 hours until the dough has at least doubled in size and has little bubbles on it.

After this first rise is complete, generously (GENEROUSLY) dust work surface with flour. Scrape the dough out of the bowl in one piece, and fold it onto itself gently two or three times into a somewhat flattened ball. Brush the surface with olive oil, and sprinkle with 1/4 t. coarse salt.

Generously dust a tea towel (non-lint towel) with flour, and place the dough on it, seam side down. If it is still a bit sticky, dust it with a little flour, cornmeal or wheat bran. (I have a linen kitchen towel that I only use for bread that I never wash – it has a nice build up of flour already in it, which prevents the dough from sticking. If you do this, make sure to hang the towel up to dry thoroughly between uses so it doesn’t mold.) Let the dough rise for 1-2 hours (I found it was closer to the 2 hour mark in my cool room-temp) in a draft-free place. About a half an hour before the end of this second rise, preheat the oven to 500 degrees, and oil a half sheet (13×18 inch) sheet pan with olive oil.

Cut the dough into 4 equal quarters, and gently stretch each piece evenly into a stick shape the length of the pan. Place on pan, leaving 1 inch between sticks. Brush with olive oil, and sprinkle each stick with a pinch of coarse salt.


Bake for 15-25 minutes (mine took only 15!) until crust is golden brown. Cool on the pan for 5 minutes, then move them to a rack to cool completely.

Examine the Food Chain

The spring seemed to last forever in Portland. Rain, cold, dark. We had to replant seeds and starts becasue the garden would not take off like past years. We even did naked chatting and dancing during the full moon to encourage growth. Our tricks worked. Finally, we are enjoying our garden veggies. Eating lots of beans this week. Steam for 6 minutes. Toss with butter, salt and pepper. Devour.

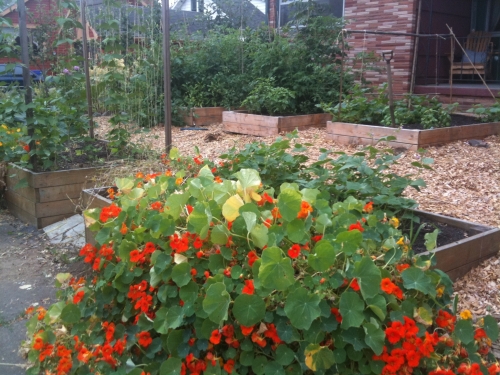
This past spring, we ripped out the grass in our front yard, replaced the grass with more garden beds and put wood chips between the beds. Here is what our yard looked like this spring.


We are happy to have less weeds to mow and I like being able to tell people who are looking for our house for the first time, “we are the ones with the wood chips in the front”. We stand out. In a good way.

We now have 12 raised beds in the front and back yard.

The 100 mile diet seemed like it would be a thing of the past after we got pregnant.

Examine the Food Chain print by Nikki McClure

Examine the Food Chain print by Nikki McClure

Now, with even more growing space and a renewed love of cooking, I am anxious to ease our way back to our experiment. How much more local can you get when you breastfeed? Here is a print we have hanging in our kitchen to help inspire us.

Last week, I cleaned out the freezer to make way for the berries I froze. I unearthed some frozen tomatoes, elk meat and frozen peppers. We made this meatball dish. Not one like I have ever made before and I enjoyed the milder red sauce and especially loved the meatballs.

Ingredients
Meatballs

* 6 ounces uncured applewood-smoked bacon (about 6 slices), diced
* 2 large garlic cloves, peeled
* 2 pounds ground beef (15% fat)
* 2/3 cup chopped drained roasted red peppers from jar
* 2/3 cup panko (Japanese breadcrumbs)
* 2 large eggs
* 1/2 cup coarsely grated onion
* 1/2 cup freshly grated Parmesan cheese
* 1 tablespoon minced fresh marjoram
* 2 teaspoons dried crushed red pepper
* 1/2 teaspoon coarse kosher salt
* 1/2 teaspoon freshly ground black pepper

Sauce

* 2 28-ounce cans diced tomatoes in juice (preferably San Marzano)
* 2 large garlic cloves, peeled
* 6 ounces uncured applewood-smoked bacon (about 6 slices), cut crosswise into thin strips
* 1 tablespoon (or more) extra-virgin olive oil
* 3 cups finely chopped onions
* 1 1/2 teaspoons dried crushed red pepper
* 2 cups dry white wine
* 1 tablespoon minced fresh marjoram

Pasta

* 1 1/2 pounds spaghetti
* 2 to 3 tablespoons extra-virgin olive oil
* 1 1/2 tablespoons minced fresh marjoram
* Freshly grated Parmesan cheese

Preparation
Meatballs
1. Place bacon in processor. Using on/off turns, grind to coarse paste. Transfer to large bowl. Using garlic press, squeeze in garlic. Gently mix in beef and all remaining ingredients. Let stand 15 minutes.
2. Line large rimmed baking sheet with plastic wrap. Using moistened hands and scant 2 tablespoonfuls for each, roll meat mixture into 1 1/2-inch meatballs. Arrange meatballs on sheet. DO AHEAD Can be made 1 day ahead. Cover with plastic wrap; chill.

Sauce
1. Puree tomatoes with juice and garlic in batches in blender until smooth.
2. Cook bacon in large pot over medium heat until crisp; transfer bacon to plate.
3. Add 1 tablespoon oil to drippings in pot and heat over medium heat. Add half of meatballs. Cook until brown on all sides, turning carefully with small metal spatula, about 9 minutes.
4. Transfer meatballs to baking sheet. Add more oil to pot if needed and repeat with remaining meatballs.
5. Increase heat to medium-high. Add onions and crushed red pepper to pot. Sauté until golden, about 6 minutes. Add wine; boil until reduced by half, stirring up browned bits, about 8 minutes. Add tomato puree and marjoram. Boil until sauce thickens slightly, stirring occasionally, about 8 minutes. Season with salt and pepper.
6. Mix bacon into sauce. Add meatballs; bring to simmer. Reduce heat to low; cover and simmer until meatballs are heated through and tender, 10 to 15 minutes. Season sauce with salt and pepper.

Pasta
Meanwhile, cook spaghetti in pot of boiling salted water until just tender but still firm to bite, stirring occasionally. Drain; transfer to large bowl. Toss with 2 tablespoons oil and marjoram, adding more oil to moisten, if desired. Divide spaghetti among bowls. Top with meatballs and sauce. Sprinkle with cheese and serve, passing additional cheese separately.

***For more information about the Nikki McClure print included in this post, check out the following sites:
Nikki McClure
Buy Olympia
Land in Portland, Oregon

Summer Carnitas

You Are What I Eat sweet baby living in my tummy and carnitas are perfect for you right now! I love all things pork and especially carnitas. Right now, we are eating a lot of carnitas since I made a big batch last week. My baby’s getting fat and plump on its journey to come meet me and Stefan. Carnitas will do my baby right!


I usually make my friend, Kelly’s carnitas recipe and it is fantastic to make on the weekend and always turns out perfectly. Make it when you have some time to be home. These are really the best carnitas I have ever eaten.

However, since I got pregnant in the cold winter months, cooking has dropped on my priority list. I continue to not enjoy it and really only get excited about the thought of cooking when I think about experiencing food for the first time through the taste buds of my new little one. I love thinking about that.
We still need to eat and although Stefan cooks almost every night of the week, I want to help out a bit in this area. I came across this recipe and it is perfect for us for 2 reasons.
1. It does not make the house hot. Since it is summer, all I want is to be immersed in a bucket of ice. You could use my ever growing tummy as a cook top; it is hot. Priority #1—stay cool!
2. The smell of cooking pork repulses me. I promise to get this love back after the baby comes but for now, running onto the back deck with my arms flailing and reenacting the gagging reflex for all of our neighbors to see gets old. Priority #2—keep those carnitas down!
Although these carnitas do not blow Kelly’s out of the water, they do provide a perfect solution to keeping the kitchen free of heat and porky smells. To accompany these, throw some dried pinto beans in a pot and cover the beans with about 2 inches of water for 8 hours. Drain and rinse and throw the beans in pot with about 2 inches of water covering them. Bring to boil, turn down to simmer and cook for about 1-2 hours until tender. You can refry these puppies with some lard and you are in for a treat!

Slow-Cooker Carnitas
makes 20-30 taco-sized servings
• 1 (6-8 pound) pork butt, also called pork shoulder
• 2 tablespoons coarse salt
• 1 tablespoon cumin
• 1 tablespoon freshly ground black pepper
• 1 tablespoon dried oregano
• 2 teaspoons ground cinnamon
• 1 teaspoon cayenne pepper, or to taste
• 8 whole cloves garlic, smashed
• 4 chipotle peppers (canned or dried)
• 1 cup tomato juice
• 1 cup orange juice

Here’s how to make it:
Trim excess fat from the meat and discard. Place all ingredients in the slow-cooker. Set to cook on LOW for 8 hours. Meat is done when it literally falls off the bone. When cool enough to handle, lift the meat from the juices and place in a large bowl. Remove the bone, then shred the meat.
Skim the fat from the juices and keep as a medium for re-heating the meat.
For carnitas tacos, reheat the meat and serve in corn tortillas with sour cream, cilantro, chopped red onion and lime wedges.

On a different note.

26 Weeks in Oregon Wine Country

26 Weeks in Oregon Wine Country


Here are some photos of my belly. I really like being pregnant and especially love watching Stefan try and figure out which body parts he is seeing. I love taking naps. I like bumping into walls and spilling things. I love waking up in the morning to hear Stefan tell me stories of how he fell asleep to the baby kicking him. I love going to bed early while we are camping and listening to my friends talk around the camp fire.

I love knowing what the name of our baby is going to be—boy or girl. I like bending down to get ice cream from the freezer only to discover I need help bending down. And, I especially love imagining the mix of Stefan and I and how that will all turn out. I think s/he will be perfect. But, then, I am a bit biased.

20 Weeks in the Sunshine

Lingering Lentils

We are camping this weekend at Clear Lake and needed some music for our drive over. I started to download the newest Splendid Table and discovered that I have not downloaded any podcasts since the end of March. I knew that I had been a walking zombie since then, but no new podcasts?

On Monday night, for the first time since we found out we were pregnant, I made granola and lentil soup. I have my mojo back and with it, a love for cooking. There are tomatoes to be planted, cookies to bake and strangers’ hands to slap as they go in to touch my ever expanding stomach—or any number of things that you do not do or utter to a woman who is growing another person.

Cooking lentil soup reminded me how happy I was to listen to my body the past couple months and slow down. Two words that people do not think are in my vocabulary. To not return phone calls. To obviously not post to this blog. To turn off my phone. And, just be in whatever moment came. Two people in my life are model citizens for this kind of living. One is Charlotte. When you are with her, you feel like there is no one else around. Time slows down and you can see and hear things that you do not normally hear. She knows how to linger into the night and make you wonder how you lived to see 3am. When you leave her, you know she listened to you. She did not just hear the words coming out of your mouth.

Slow down

Slow down

The other person is Stefan. When I am with my husband in the woods, at the farm, on a beach or on the ocean, I feel like I am the only one around and maybe more importantly, like what we are doing at the moment is exactly what we are supposed to be doing. Like we are right where we belong. Everything else disappears. It is not necessarily moments filled with fireworks or Pink Floyd laser light shows. It feels still. And simple. And right. Stefan also is a master at lingering. One of my favorite places that he lingers is at Jeff and Suzanne’s house. I slowly rub his back when it is time to leave and he bounds into a new topic where we find ourselves filling up our glasses a couple more times before we do find our shoes and leave.

The lentil soup I made felt right. And simple. It fills me up. Lingers. I hope that when I eat this, my baby gets some of that stillness. And to understand not only how to slow down, buy why. To pause and linger for that one last conversation with an old friend.

Lingering Lentil Soup
INGREDIENTS
• 1 tablespoon olive oil
• 1 large onion, diced
• 4 stalks of chopped celery
• 2 large carrots, peeled and cut into fine dice
• 6 cloves garlic, minced
• 10 sprigs fresh thyme
• Dash of paprika (Hungarian if you’ve got it)
• 8 plum diced tomatoes
• 6 cups chicken broth
• 2 cups French lentils
• 2 bay leaves
• Dash salt
• Pepper
INSTRUCTIONS
1. Preheat a large pot over medium heat and add oil. Sauté the onion, celery, and carrots for about 10 minutes, until onions have browned a bit. Add the garlic, thyme, and paprika, and sauté for 2 more minutes. Add the tomatoes and a little splash of water if necessary, and stir to deglaze the pot. Cover and cook for 5 minutes.
2. Add the water, lentils, bay leaves, salt, and pepper, then cover and bring to a boil. Once the soup is boiling, reduce the heat to a simmer and cook, covered, for about 45 minutes, or until the lentils are tender. Blend about half of the soup with a hand blender. Serve with good, crusty bread.

Ramona’s Pozole in Yelapa, Mexico


We recently returned from Yelapa, Mexico where we learned how to make Pozole from Ramona Gutierrez who does not speak English. Since my Spanish is limited, we talked to her through a translator, Isabel. Yelapa was a perfect place for us to rejuvenate our local eating habits since the town, like many towns in Mexico, is built on a culture of eating what is in season and using recipes passed down for many generations.

Each Monday night, Ramona makes a large batch of pozole for the town.

Ramona Cooking

Ramona Cooking

You can buy a bowl of Pozole with cabbage, radishes and salsa on the side and watch a movie.

Pozole with a Movie at Ramona's

Pozole with a Movie at Ramona's

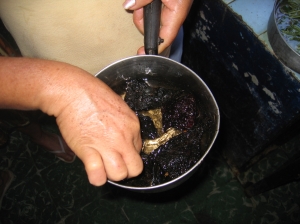
When we got to Ramona’s, we instantly felt welcome as Ramona patiently and carefully explained each step of the soup that has been a Mexican tradition for years. As we ate Pozole with the town, I was surprised at how even though the soup is simple to make, the flavors are complicated.

Here is a video of Ramona cooking.
In between Pozole instructions, I played with the children running under foot. I asked a beautiful little girl what kind of candy she was eating, “qué tipo de caramelo está comiendo”. Her response was unexpected and obvious. She replied with a large smile on her face “azúcar, sucre!”. I hope that my child is that honest. I poked at my belly and asked “are you hearing this? Always tell the truth with a smile on your face!”.
Ramona’s Pozole

Poblano Peppers

Poblano Peppers


Ingredients:
• 4.5 lbs. pork legs with the bone in
• 4.5 lbs pork stew bones
• 3.5 lbs. beef tongue
• 5 dried Poblano chilies, seeds removed
• 2 cloves garlic
• 2 tsp oregano
• 5 tomatoes
• 6.5 lbs. hominy

Meat!

Meat!


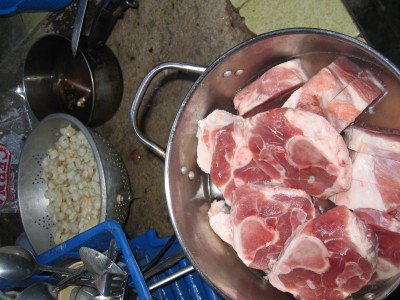
1. Put the pork bones and the tongue in a large pot and cover with water about 1 inch over the meat.
2. Boil for one hour
3. In the meantime, boil the chilies for 2 minutes.
4. Add the garlic and oregano to the chilies
5. Blend the chilies, garlic, oregano and tomatoes together. Set aside
6. After one hour of boiling the meat, add the pork legs
7. Boil for another hour
8. Add the hominy and water to cover and simmer for one more hour (3 hours total)
9. Salt to taste
10. Serve with chips, tostados, radishes, cabbage, onions, dry hot peppers, lime oregano

Salsa
Boil 20 serrano chilis with a bit of salt. Blend with a bit of vinegar and one clove garlic. Salt to taste.
Serves 20 or more

You are what I Eat

I have only shared with one dear friend that when I started this blog that the title, “I am what I eat” may change. And now, I am happy to make the change. The new title is “you are what I eat” because Stefan and I are going to have a child in October. And, I think and hope that our child will be what I eat. That like me, the baby will absorb the goodness that comes from sharing food with people and be inspired by what they eat. Although this will not be a place where I post about being pregnant, I will inevitably share parts of our pregnancy since I hope that our child is shaped by what I eat.

Illustration by Barry Falls

Illustration by Barry Falls


I hope that the food that I share with others will help, not only me, but will help my child soak up friends’ and families’ good stuff. That our kid will be curious and flexible not only in the kitchen but in all parts of life. I am visiting the friend who I shared this blog’s title change this weekend. I hope that when we eat together, my kid will soak up her goodness—she is incredibly flexible in the kitchen and always willing to try new things. For years I have called her to say “do you have that recipe for so and so that so and so made us?”. Her answer is always the same. No recipe because she is comfortable in the kitchen improvising and remembering by taste.

I hope that when I am near her, my kid will adopt that trait—her curiosity and confidence to try new things and be willing to fail. Because it is not one of my strong suits. Is that what they call osmosis?

I have not posted to my blog in over a month because I slept for what felt like the first 11 weeks of my pregnancy. I was instantly humbled by my lack of time to practice a 100 mile diet. And, now that the garden is in full swing and I only want to eat red meat, veggies and fruit. We will slowly work our way back to our experiment of eating foods grown within 100 miles of where we live every other week and I will continue to share what we learn.

Chickpeas and Pork

Last weekend, some dear friends cooked us a local dinner and it was delicious. If you can get your hands on some dried chickpeas, use them in the dish below. I could have eaten the whole thing on my own.

Both of these recipes are from Mark Bittman. Check out his cookbooks and it’s really easy to find him on the NYT where he writes the Bitten Blog.

Grilled Meat Skewers and Bay Leaves
Ingredients
• 1 1/2 to 2 pounds pork or lamb shoulder, or beef tenderloin (filet mignon), cut into 1 1/2- to 2-inch chunks
• 3 tablespoons extra virgin olive oil
• Salt and pepper to taste
• 1 tablespoon minced garlic
• 15 to 20 bay leaves, preferably fresh
Method
• 1. Start charcoal or gas grill, with the fire moderately hot, and the rack about 4 inches from the heat. If using wood skewers, soak in water while you prepare the meat.
• 2. Toss meat with oil, salt, pepper and garlic. Skewer meat alternately with bay leaves; if leaves break, jam between meat chunks.
• 3. Grill the meat 2 to 5 minutes per side, depending on the fire’s heat and how well done you like your meat. Remove and serve.

Fried Chickpeas With Chorizo and Spinach

Ingredients
• 1/4 cup olive oil, plus more for drizzling
• 2 cups cooked or canned chickpeas, as dry as possible
• Salt and black pepper
• 4 ounces chorizo, diced
• 1/2 pound spinach, roughly chopped
• 1/4 cup sherry
• 1 to 2 cups bread crumbs
Method
• Heat the broiler.
• Put three tablespoons of the oil in a skillet large enough to hold chickpeas in one layer over medium-high heat. When it’s hot, add chickpeas and sprinkle with salt and pepper.
• Reduce heat to medium-low and cook, shaking the pan occasionally, until chickpeas begin to brown, about 10 minutes, then add chorizo. Continue cooking for another 5 to 8 minutes or until chickpeas are crisp; use a slotted spoon to remove chickpeas and chorizo from pan and set aside.
• Add the remainder of the 1/4 cup of oil to the pan; when it’s hot, add spinach and sherry, sprinkle with salt and pepper, and cook spinach over medium-low heat until very soft and the liquid has evaporated. Add chickpeas and chorizo back to the pan and toss quickly to combine; top with bread crumbs, drizzle with a bit more oil and run pan under the broiler to lightly brown the top. Serve hot or at room temperature.
Yield: 4 servings.

Visiting the Farm

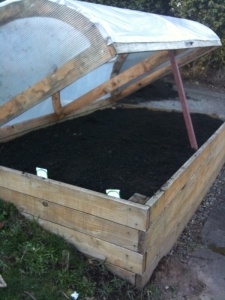
Last weekend, we went to the farm in Southern Oregon with Stefan’s sister, Camille and her husband, Matt. I love the farm because it is where Stefan learned how to grow a garden. Stefan moves in our garden in Portland with an unassuming grace. Every seed he plants grows. Because he learned how to plant, water and harvest food when he was barely walking, gardening comes naturally to him as an adult. The lettuce seeds he planted in our covered raised bed 2 weeks ago are coming up nicely. There is a sea of itty bitty green leaves. This never happens to me.

At the farm, we cooked, played cards, read and hiked. The madrone (arbutus) trees scattered everywhere are solid and they have a beautiful red bark that is the color I want to dye my hair when I start to turn gray. Camille is an excellent at all things hair and I bet she can match the color perfectly. These trees will always remind me of running in the hills outside Berkeley. As well as the fog.

The photos are taken on our hikes and one of the cabin. At the bottom, I included a recipe for the tastiest tomato soup we have made yet and ate at the farm. I found the recipe at this great website. Local and delicious. The tomatoes came from our garden last year. We froze a bunch and they cook up really well in soups.

Tomato Soup
Adapted from Jane & Geoff

Ingredients:
2 (28 oz) cans whole tomatoes (I prefer San Marzano – and it’s worth the expense)
2 medium or 1 large onions, finely chopped
6-7 cloves garlic, roughly chopped
Chicken or vegetable stock (16 oz)
1 tsp finely chopped basil
Salt
Pepper

Ricotta (optional)
Pesto (optional)

Preparation:

1. Saute onion & garlic in olive oil slowly until translucent and softened substantially.
2. In a tall heavy-bottomed pot, add tomatoes and the stock. With a wooden spoon, squish the tomatoes down against the wall of the pot. Stir in basil. Bring to a point where the soup is almost boiling and reduce heat to low. Simmer for 30 minutes to let the soup thicken.
3. With an immersion blender, blend the soup until all the tomatoes are pureed and the soup is has a smooth consistency.
4. Season with salt and pepper and serve, garnished, if you like with a dollop of ricotta and a swirl of pesto.
Serves 6.

This is what the bugs do to Cedar trees.  Isn't it pretty?

This is what the bugs do to Cedar trees. Isn't it pretty?

That Teaser Febraury Sun

We planted seeds this weekend indoors and out. Instead of trying to grow seeds in the bathtub, I built a platform for my seed trays out of IKEA shoe shelves on top of a table (it teeters, it totters but it won’t fall down!) and put them in front of our windows in a back bedroom. So far, so good.


In January, when we planted seeds in the trays and put them in the tub, the plants got too leggy and I gave up after noticing mold in the dirt. This time, we are going to try to grow the seeds with natural light and use a spray bottle instead of the shower head. I have always had a problem with excess.

We decided to rip out the grass in the front yard and use the space for growing veggies. We want it to look, someday, like this. We had the dirt delivered on Friday and had good intentions of building raised beds this weekend to shovel the dirt into and voila! Garden done. Not so fast. We managed a few things, and like usual, our eyes were bigger than our muscles.

Eventually, we are going to add 2 more raised beds for a total of 5 and I want to create a circular garden patch like this. We have the dirt. Now, we will build and dig and plan. And, lay down from exhaustion. Which is why we did not get farther along this weekend.
We did transfer the baby spinach out of the covered bed to an uncovered one. In the uncovered bed, we have spinach starts and planted radish seeds. In the covered bed, we planted lettuce seeds.

We did have a gorgeous weekend and it was great to be outside planting things that we know full well could freeze in March or even April. Stefan thinks that this teaser week of February sun that happens every year is the reason people stay in Oregon. I tend to agree.